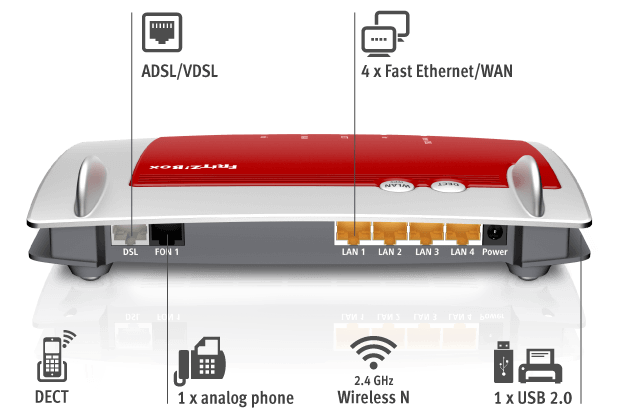
How do I install and configure my FRITZ!Box 7430 modem
What LED indicators are
| Power/DSL | |||
| Green solid | FRITZ!Box has electrical power and the DSL line is ready for operation | ||
| Green flashing | Device has electrical power and the connection to DSL is being established or has been interrupted | ||
| Fon | |||
| Green solid | Telephone connection to the Internet is ready | ||
| Green flashing | Messages in your voice mail or e-mail inbox | ||
| DECT | |||
| Green solid | Registration procedure for a DECT device in progress | ||
| Green flashing | Messages in your voice mail or e-mail inbox | ||
| WLAN | |||
| Green solid | Wireless LAN is enabled | ||
| Green flashing | • Switching wireless LAN function on or off • Applying changes to the wireless LAN settings • Performing WPS • WPS procedure aborted: more than two wireless devices are performing WPS at the same time. Repeat the WPS procedure |
||
| INFO | |||
| Green solid | There is an event in the user interface under System / Buttons & LEDs / Info Display | ||
| Green flashing | • Updating FRITZ!OS • There is an event in the user interface under System / Buttons & LEDs / Info Display |
||
| Red flashing | Open the user interface and follow the instructions under Overview |
Automatic Configuration
Modem configuration has become much easier! You don't have to fill in the line details and logins anymore. Simply by choosing edpnet as your provider your modem will synchronize with our autoconfiguration server and connect to the Internet!
Step 1 — Opening the web interface
Open your web browser (Internet Explorer, Firefox,…) and go to: http://fritz.box
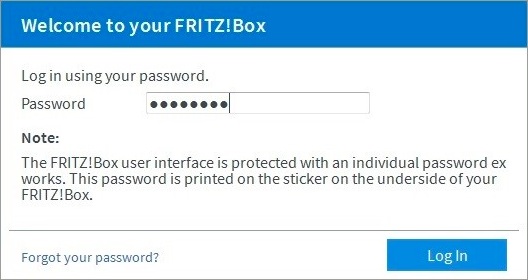
Step 2 — Administrator password
First of all, you need to fill in the password of your FRITZ!Box 7430. You will find it on the white sticker at the bottom of your device (see FRITZ!Box password).
After you fill in the password, press Log In.
Step 3 — Language choice
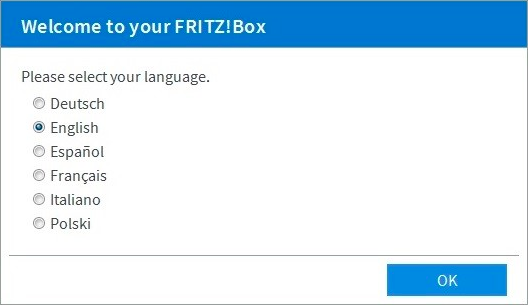
Now you see the wizard for the first basic configuration. Select English or another language if preferred. Click on OK to continue.
Step 4 — Regional setting
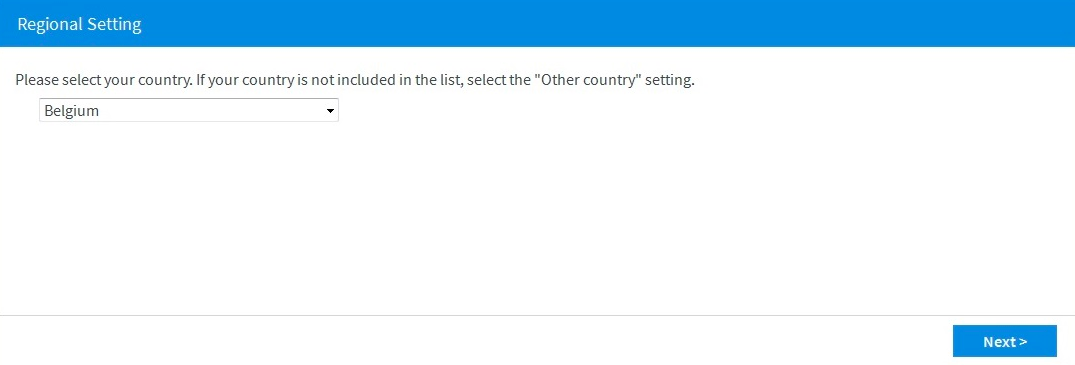
The language of the web interface has now changed to the language of your choice; in our case to English.
Next you see the screen to choose the regional setting. In the combo box you select Belgium and click on Next.
Step 5 — Selecting the Annex
In order to make a successful connection to the edpnet network, your device needs to be put into the correct Annex setting.
The Annex-setting depends on the type of your connection.
| ADSL (PTSN) ADSL (Raw Copper) |
ADSL (ISDN) | VDSL |
| Annex A | Annex B | |
Choose the corresponding Annex setting and press Next.
 |
Step 6 — Reboot
The Fritz!Box will now automatically reboot and after about 1 minute you will see a Welcome screen.
Step 7 — Welcome screen
The next screen is the Welcome screen, where you can start the wizard to set up your internet connection.
You can click on Next to start the wizard.
 |
Step 8 — Choosing your ISP
In the wizard you need to choose your ISP (=Internet Service Provider).
Choose EDPNET in the drop-down list and press Next.
 |
Step 9 — Confirm the settings
Here you need to confirm the settings.
When you choose EDPNET as your ISP, all the settings have been filled in automatically for your connection. Press Next.
 |
Step 10 — Checking internet connection
Your device will now try to connect.
If there is a green line, it means the configuration has been finished successfully. Press Next.
In there is a red line, check if your modem/router is still connected to the DSL-line and if it gained synchronization (the Power LED is on and not blinking).
If you are not sure if your device is receiving a DSL-signal, please, contact our customer service.
Step 11 — Telephony setup
You can skip this step if you do not use VoIP-telephony or if you are using edpnet telephony. Everything will be configured automatically.
| NOTE! If you want to set up more than 3 numbers, they will not be configured automatically. You can follow the steps in the manual configuration part of this guide. |
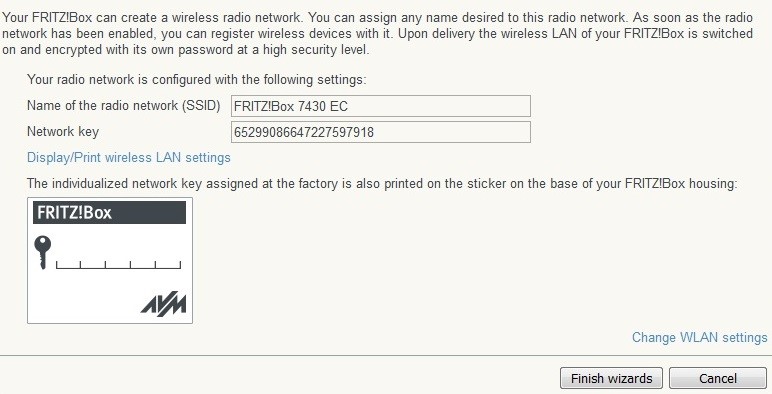
Step 12 — Setting up wireless LAN (Wi-Fi)
You can leave the configuration as it is because your wireless connection is already configured on the FRITZ!Box.
The password of your wireless connection is unique and can be found on the label at the bottom of your device.
You can also change the network name (SSID) and password of your wireless connection.
If you are going to change the Wi-Fi settings, we strongly recommend you to write them down.
Press Finish wizards.
Step 13 — Wait and verify
We advise you to wait for about ten minutes while your device is being automatically configured.
You are about to surf on the Internet and call with your edpnet telephony!
Check if your internet connection is up and running by going to Internet - Online Monitor in the menu on the left and checking if both DSL and Internet LEDs are green.
 |
If you still have no access to the Internet after ten minutes passed, please, follow the Manual configuration steps below in this guide.
Manual Configuration
These steps can be followed if your internet connection is still not working after you followed the above-mentioned steps of automatic configuration. This part of the guide continues the steps of automatic configuration.
Internet connection
Step 14 — Online Monitor
Click on Internet in the menu on the left and go to Online Monitor. In the window of Online Monitor you can check the status of your internet connection (If there is a DSL-signal on your line, you will see a green LED next to DSL under Interfaces.)
Click on Account Information in the menu on the left.
Step 15 — Account Information
Choose EDPNET in the drop-down list of Internet Service Provider. The only thing you have to fill in at this step is your connection logins (username and password) which you received from edpnet.
Then press Apply.
 |
If the logins have been filled in correctly, the Internet LED will become green on the Overview screen.
It means your device is connected to the Internet!
 |
Telephony
You may skip these settings in case you are not using edpnet telephony.
Step 16 — Telephony Menu
To set up your phone numbers, go to Telephony in the left menu of the main screen (Overview).
Click on Telephone Numbers in the left menu.
Step 17 — Telephone Numbers
In the first tab (Telephone Numbers) you can set up a new telephone number by pressing New telephone number.
 |
Step 18 — Internet telephony setup
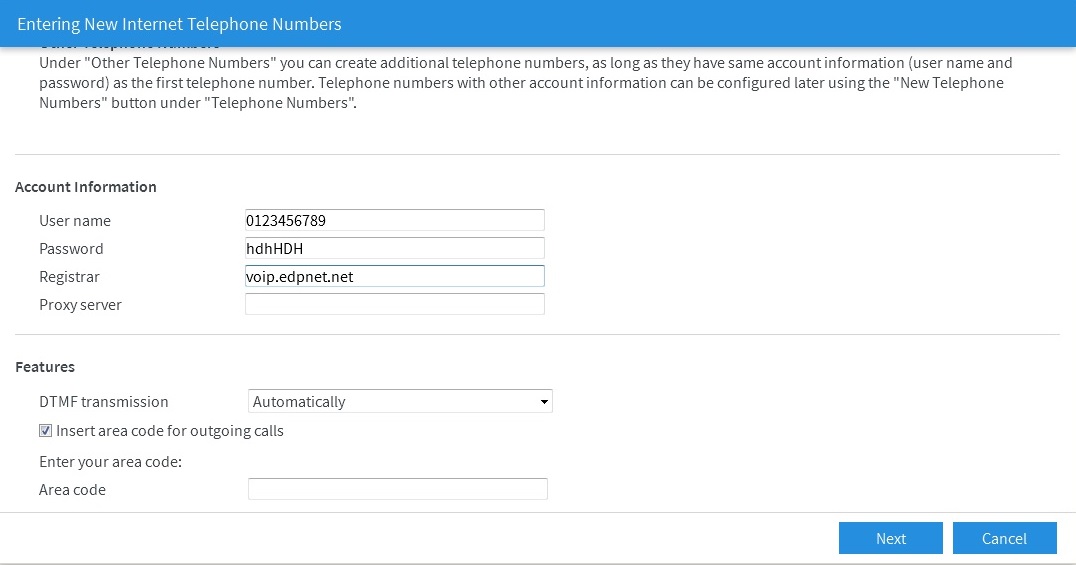
Fill in all VoIP-settings for your phone number in the next window.
Under Telephony provider choose Other provider.
Internet telephone number: your phone number (e.g. 032656700)
Internal telephone number: your phone number
 |
User name: your phone number (e.g. 032656700)
Password: your VoIP-password
Registrar: sip.edpnet.be or voip.edpnet.be
Other settings may remain unchanged. Press Next.
 |
Step 19 — Save settings and check telephony
Verify if all the settings are filled in correctly.
Press Back if you want to change anything.
Press Next if the settings seem correct.
Your settings will be checked now. If the configuration is successful, press Next.
 |
If the configuration has been finished successfully, the Status LED next to your phone number will become green.
 |
Complete manual (PDF)
Download here the full manual of the Fritz!Box Fon WLAN 7430 (PDF).
