How do I configure a SIP trunk on my Fritz!Box
Configuring a trunk
Open the Fritzbox interface
Surf to fritz.box or 192.168.178.1 and enter the account details if requested.
Open the Telephone Numbers page
In the menu on the left side of the Fritzbox you will find the option Telephone Numbers under Telephony.
Click on this option.
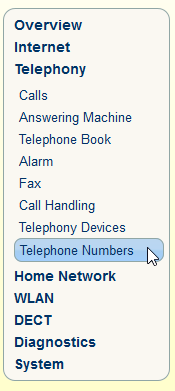
Telephone Numbers
On the newly opened page you will see no numbers have been configured yet. Click on the button New Telephone Number.

Configuring Outbound Caller ID
We are configuring Voice over IP, so select IP-based line and click Next.

Entering Telephone Number
Provider
In the provider field, select SIP trunking with various telephone numbers from the options.

Account Information
The page will change with new options. Enter your phone numbers one by one in the table. You can add extra fields by using the Add Telephone Number button. You can remove them by pressing the red X button next to each line.
The following fields are always the same:
Username: 0 (or a username if you requested one)
Password: 0 (or a password if you requested one)
Registrar: 212.71.16.194
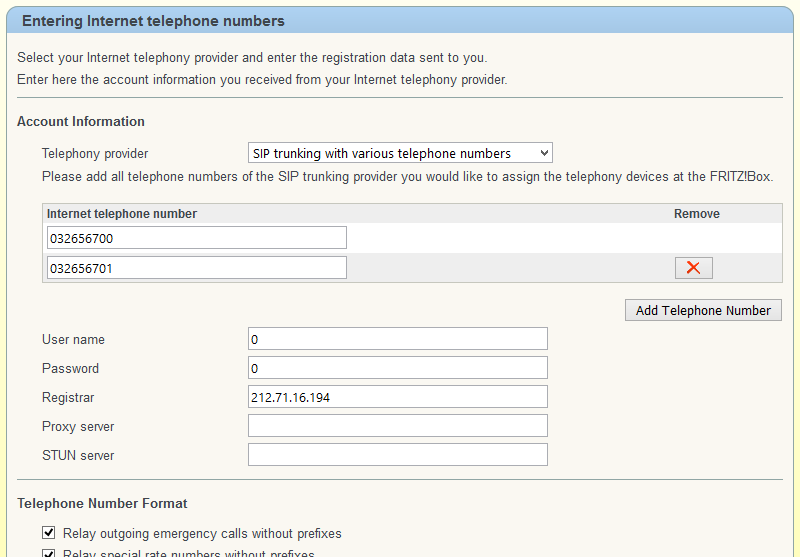
After you are done, click on the OK button.
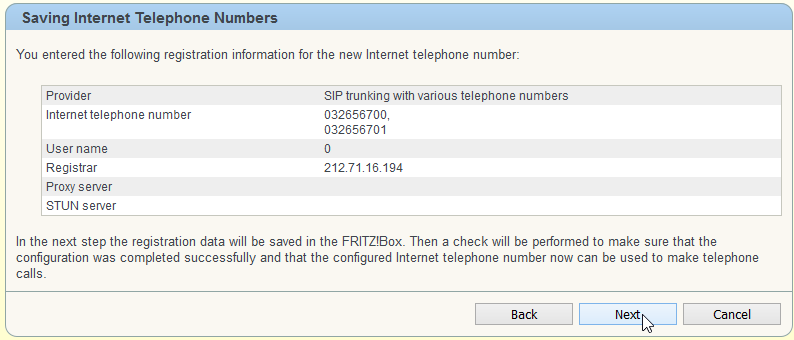
Saving Internet Telephone Numbers
You will now be given an overview of your settings. verify these and click on Next to check the connection.
Checking Internet Telephone Numbers
The device will now verify your details. This process can take a few minutes depending on the amount of numbers you have entered. The bar will become green once this check has succeeded.
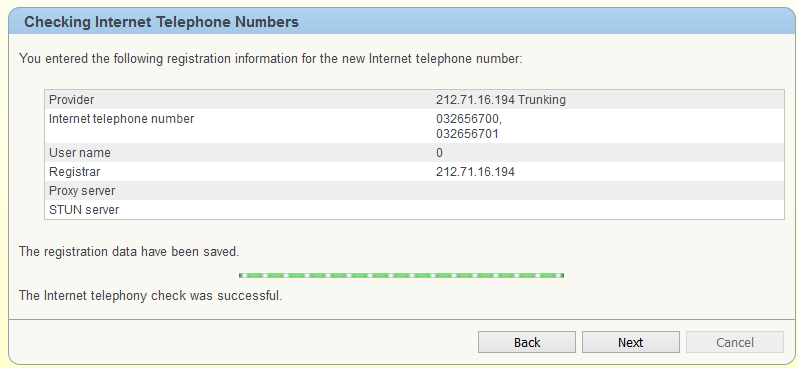
Click on Next to finish the process.
Telephone Numbers
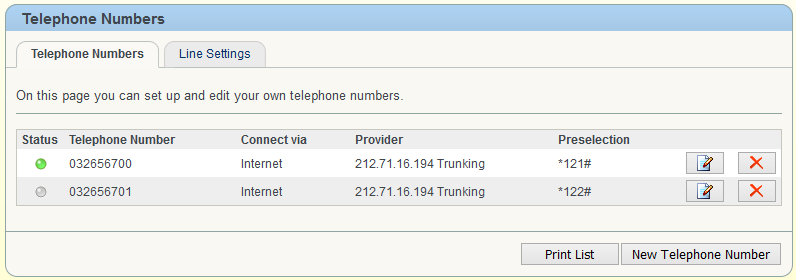
If everything went well, you will return to this page and your newly entered numbers will be visible now.
Note: Only the first of the Status icons will be green. This is normal as it's a SIP trunk.
Configuring Devices
You can now assign the numbers to your telephone devices. Click on Telephony Devices in the menu.
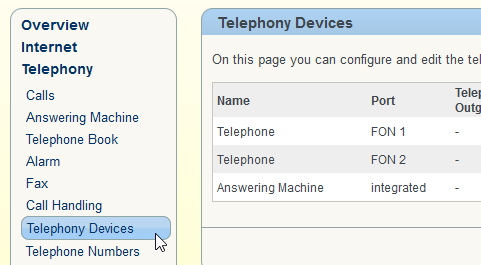
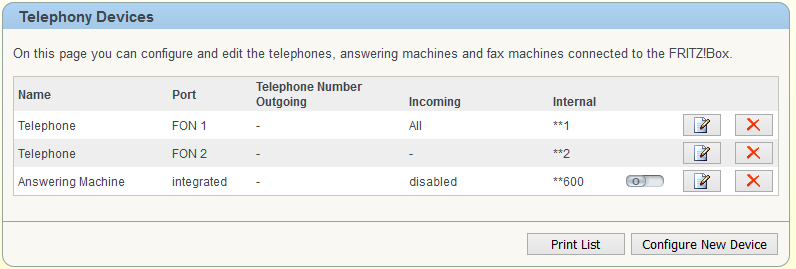
Telephony Devices
By default, you will see a Telephone entry and an Answering Machine entry. For a Fritzbox 7490 you will have 2 Telephone entries because the device has 2 FON ports.
From here you have 2 options. Edit existing entries or create a new one.
Option 1 - FON Ports
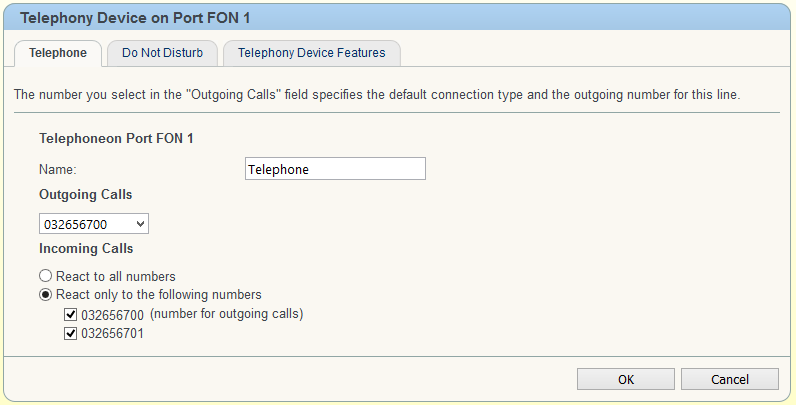
You can select which number the devices on the FON ports will react on and which number they will show when you call out.
Click on the paper and pencil icon to edit one.
Change the name of the device and select the options you want and click on OK. These will be saved and activated.
Now connect a PSTN phone to FON port you've just configured.
Option 2 - Use an ISDN PaBX
If you have an ISDN PaBX you can also choose to send all calls towards it. Click on Configure new device.
Configure New Device
Select the ISDN PBX option and click Next.
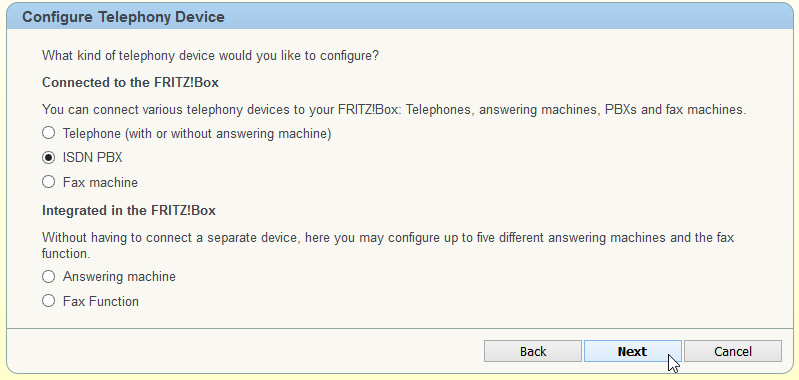
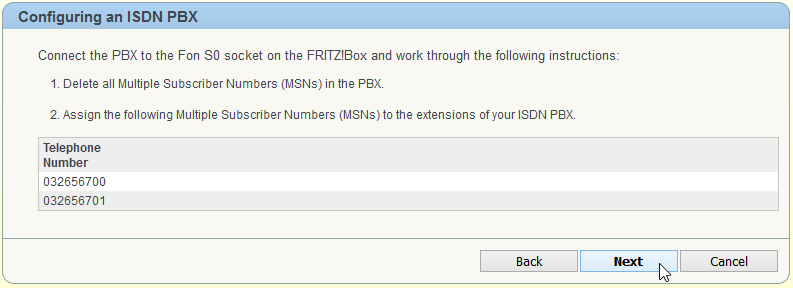
Configuring an ISDN PBX
The guide will now give you instructions on how to connect and configure your PaBX to ensure everything works correctly. Make sure this has been done before clicking on Next.
Apply Settings
Simply click on Apply to continue.

You are now done. All calls towards your trunk will be routed to the ISDN PaBX connected to the S0 bus.
Option 3 - Combine both
You can follow options 1 and 2 and combine the workings. Please take the following in mind:
Every number will be sent to the ISDN PaBX, even if you also configure it on the FON port. Make sure to ignore said number in the PaBX to prevent that device from picking up those calls.
