How do I install and configure my Zoiper
This small article will explain how to configure a Zoiper account if you have a Cloud Telephony with edpnet, whether you're using VPN or not.
If you are configuring Zoiper in the office
1. Download Zoiper and install it:
2. Download the provisioning file for your extension/device. In order to do that, go to the GUI of your virtual PBX.
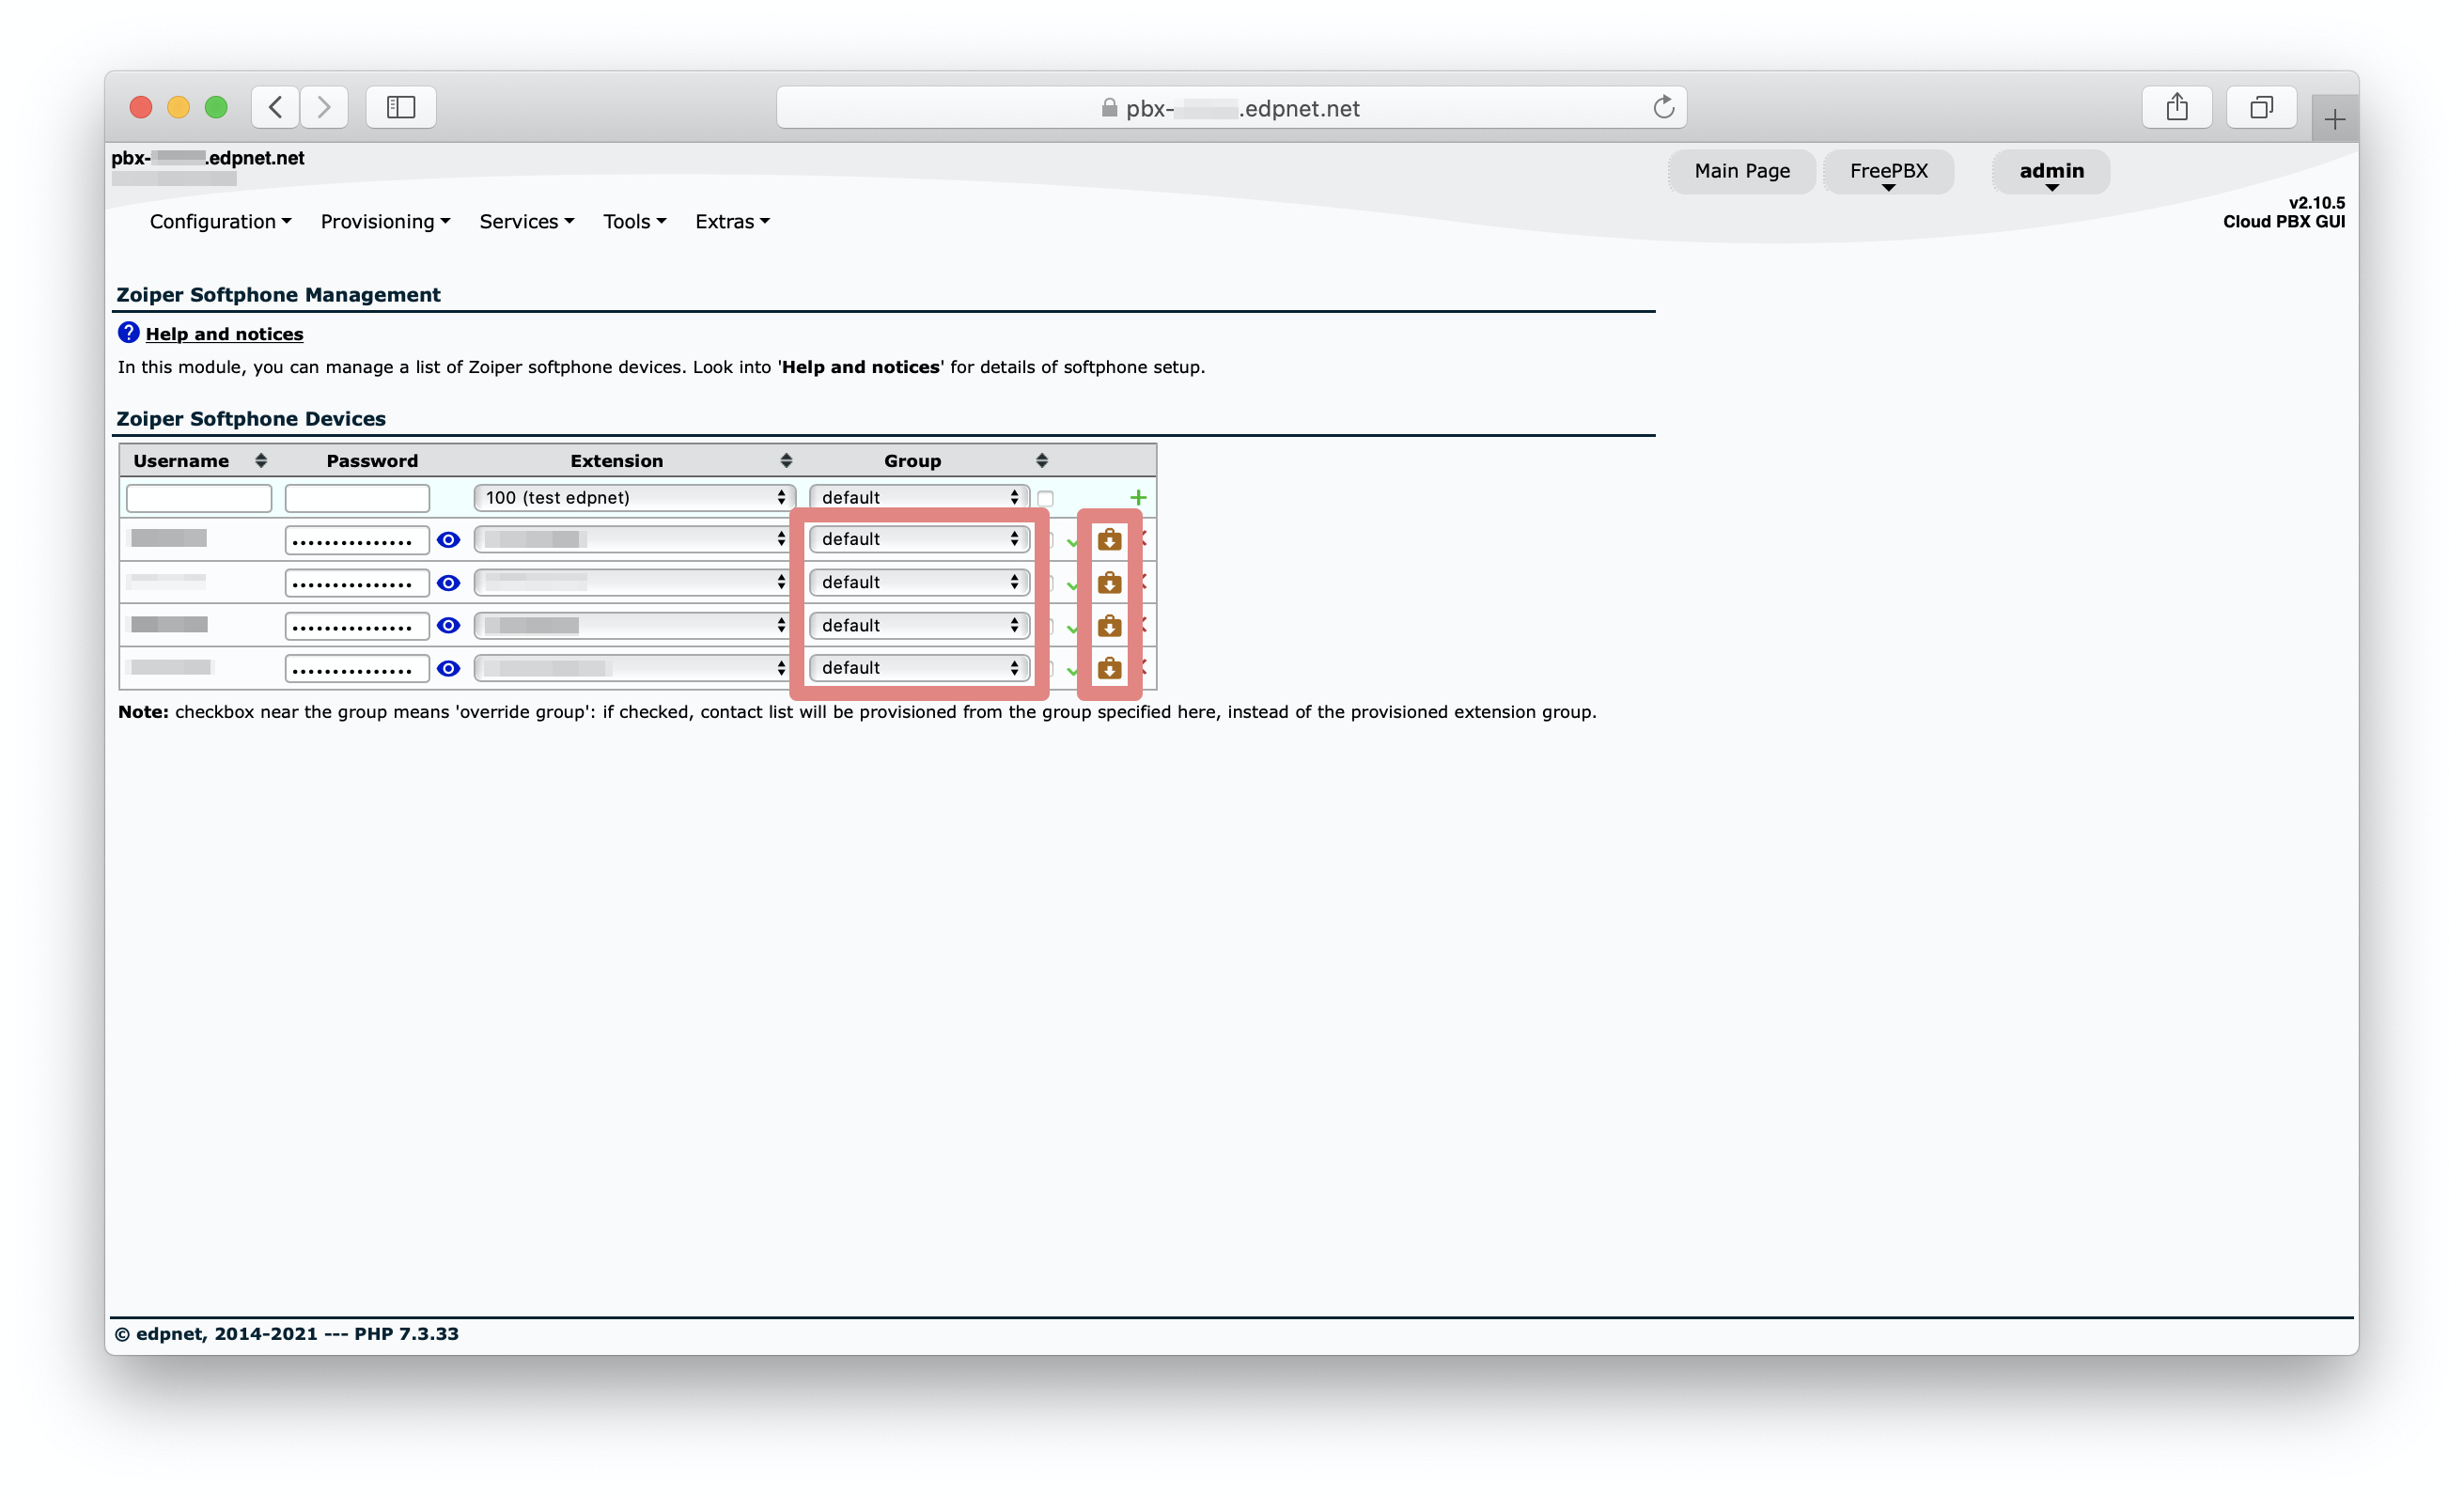
In the menu on top, click on Configuration and select Zoiper Softphones from the drop-down list. Select the Group default next to the device that you're setting up and hit download icon.
You can access the GUI of your PBX via its IP address or the following URL: https://pbx-[your company name].edpnet.net.
If you have any difficulties opening the page, please get in touch with our support, we will guide you through, or simply send you the .OVPN profile(s) you need!

3. Rename the file that you have just downloaded to Provision.xml and place it into:
- Windows: either Zoiper installation path or an Application Data\Zoiper5 user directory (AppData\Roaming\Zoiper5)
- Mac: Zoiper configuration path (~/Library/Zoiper5)
4. Run Zoiper, activate your Zoiper license with credentials that you have received from our support, and the softphone will provision itself.
If you are configuring Zoiper in a different location
1. Download OpenVPN Connect Client and install it:
2. Download the .OVPN profile. In order to do that, go to the GUI of your virtual PBX.
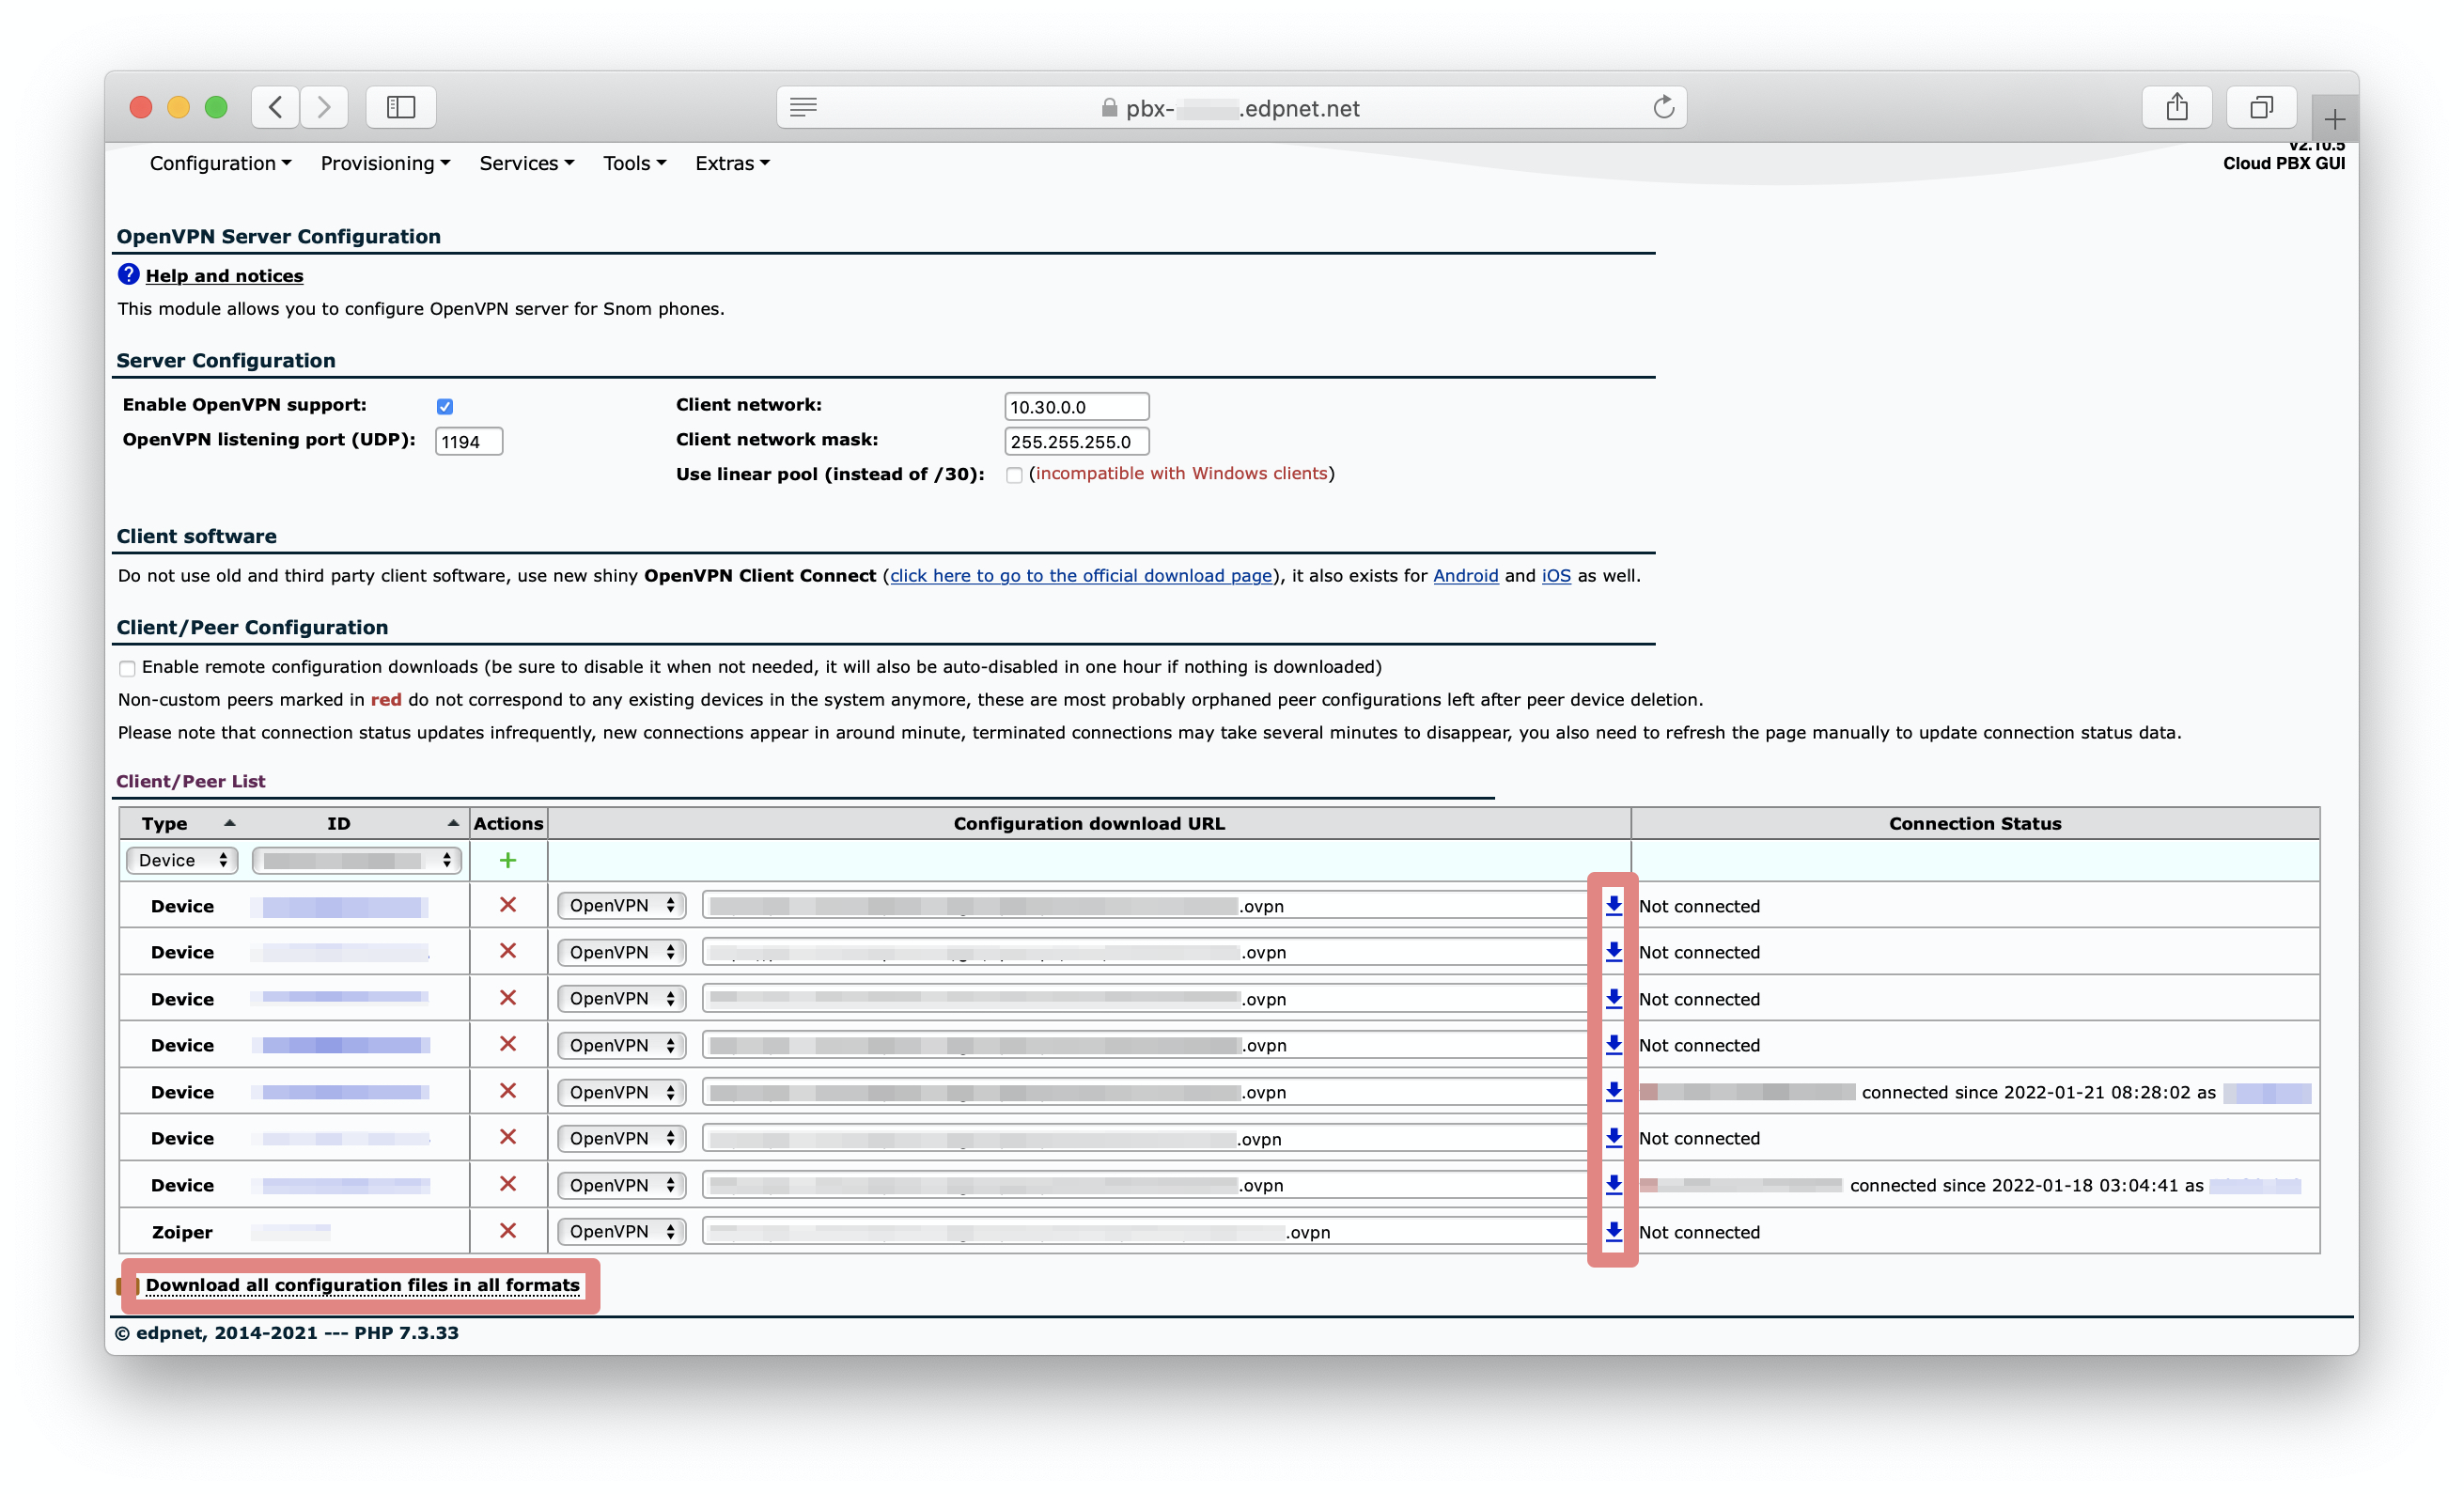
In the menu on top, click on Services and select OpenVPN Server from the drop-down list.
Under Client/Peer List, download the configuration file that you need.
You can access the GUI of your PBX via its IP address or the following URL: https://pbx-[your company name].edpnet.net.
If you have any difficulties opening the page, please get in touch with our support, we will guide you through, or simply send you the .OVPN profile(s) you need!

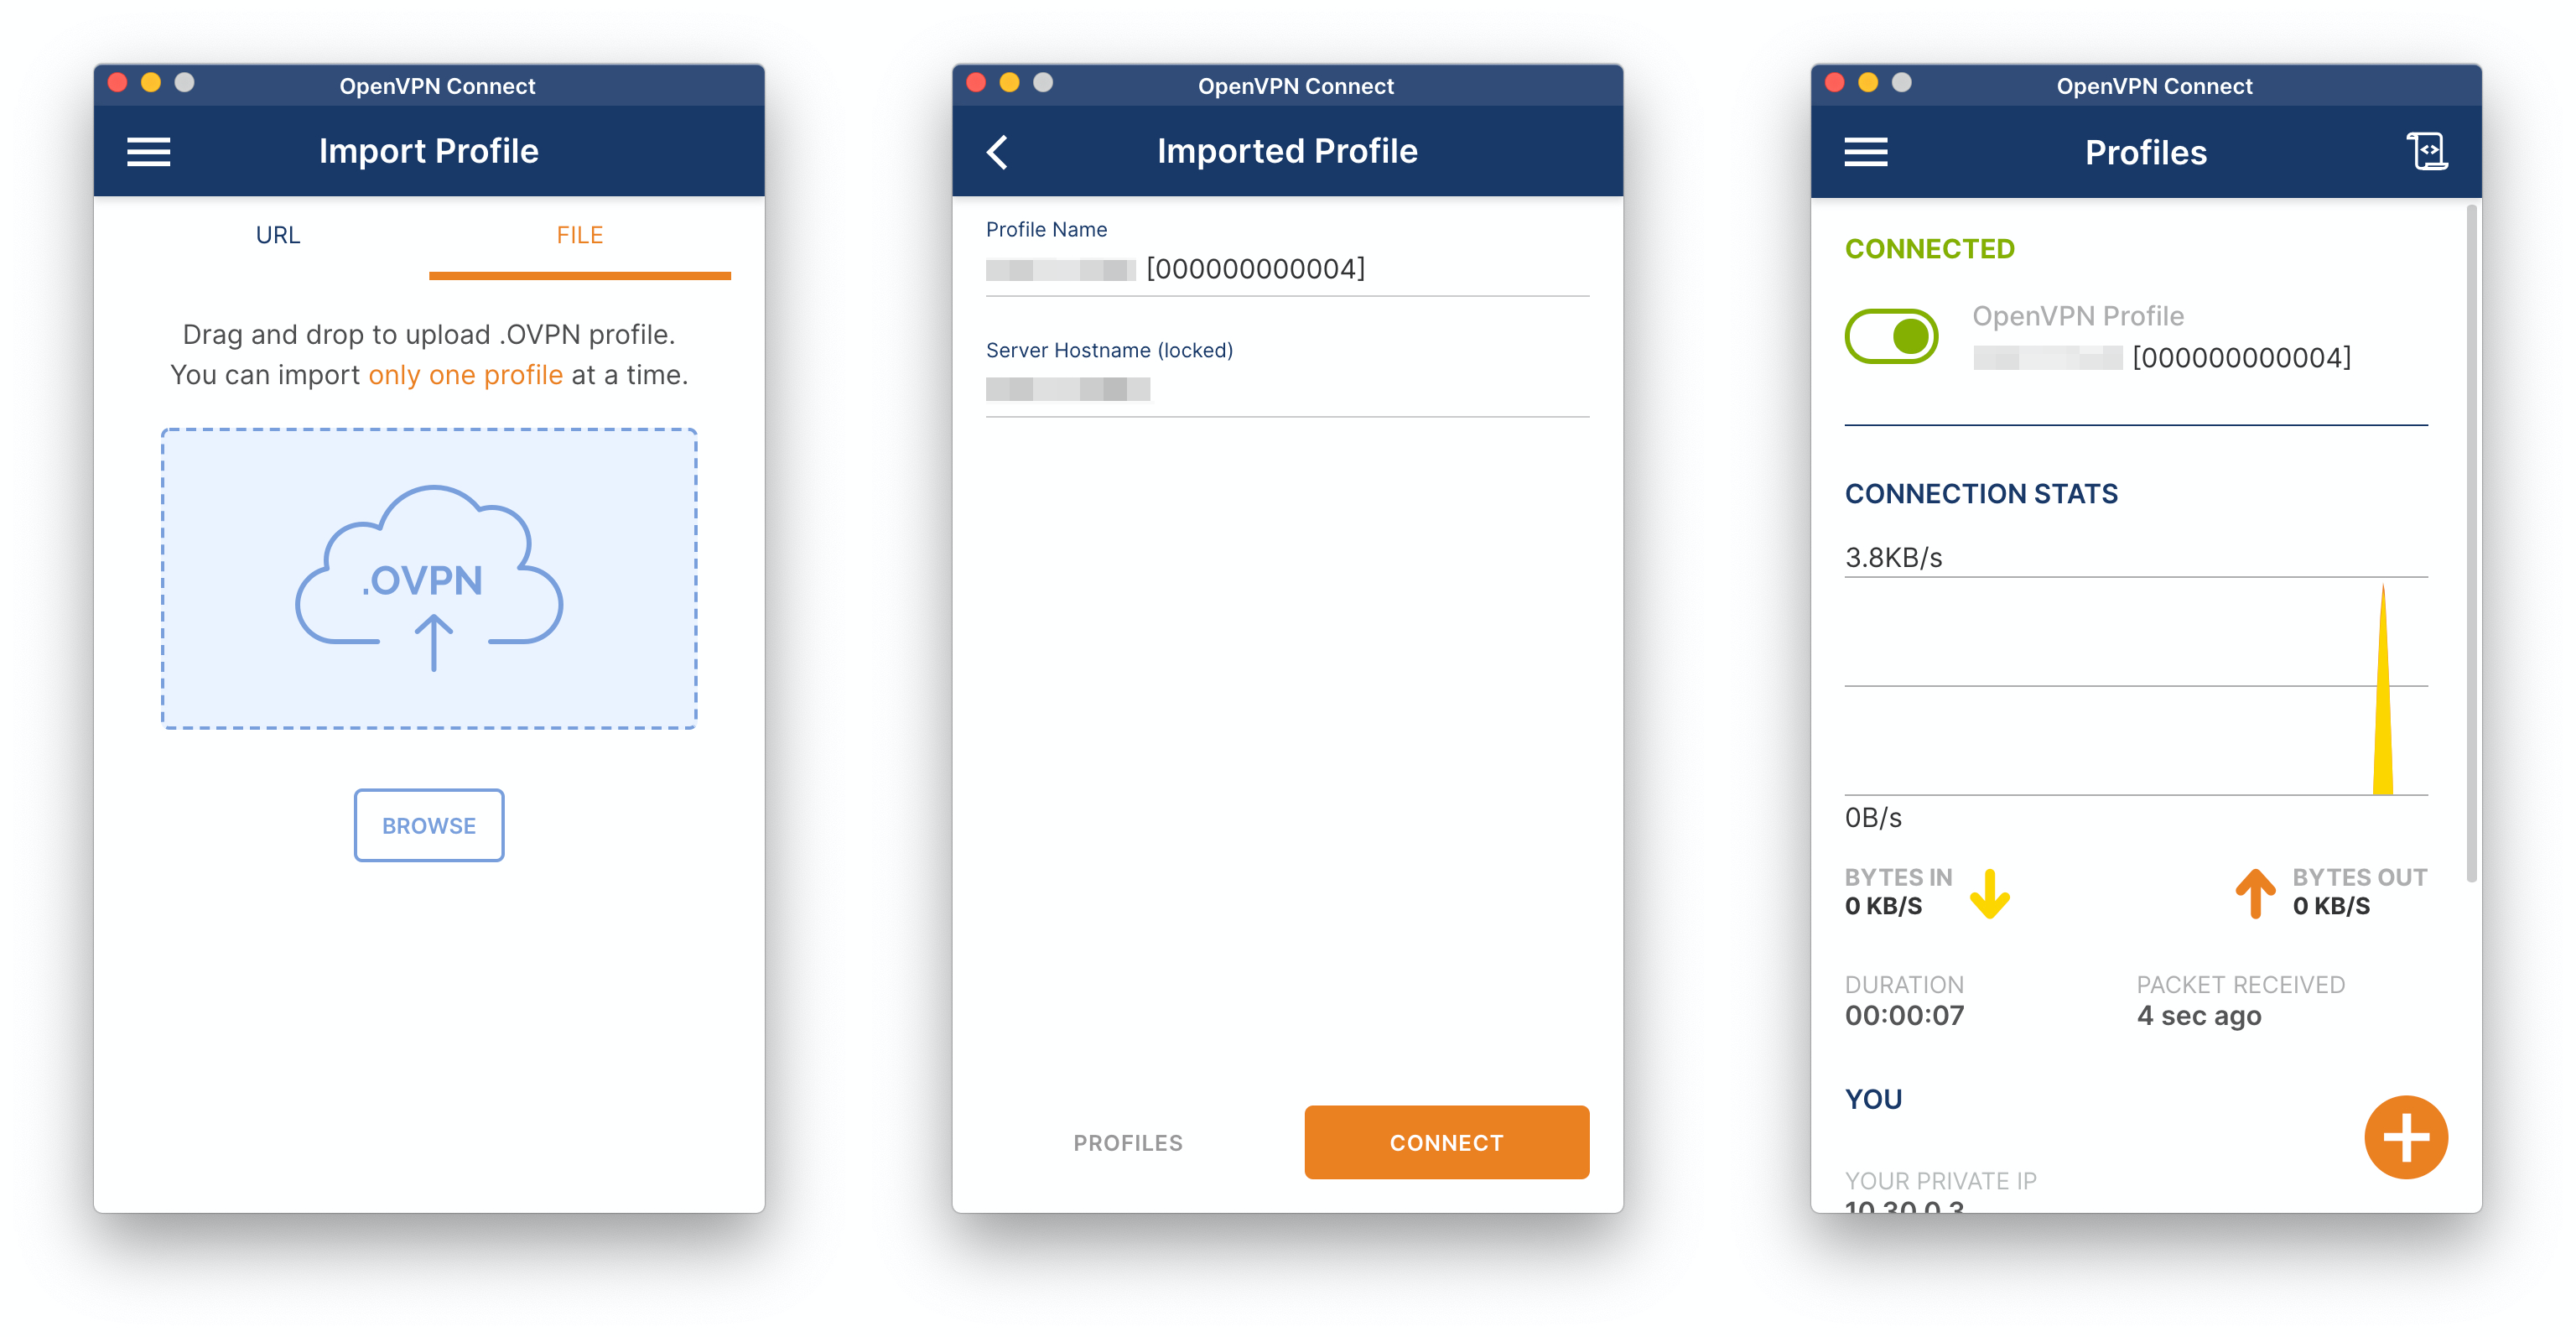
3. Open OpenVPN and import the profile that you have downloaded. Make sure that the connection status is Connected:

4. Download Zoiper and install it:
5. Download the provisioning file for your extension/device. In order to do that, go back to the GUI of your virtual PBX.
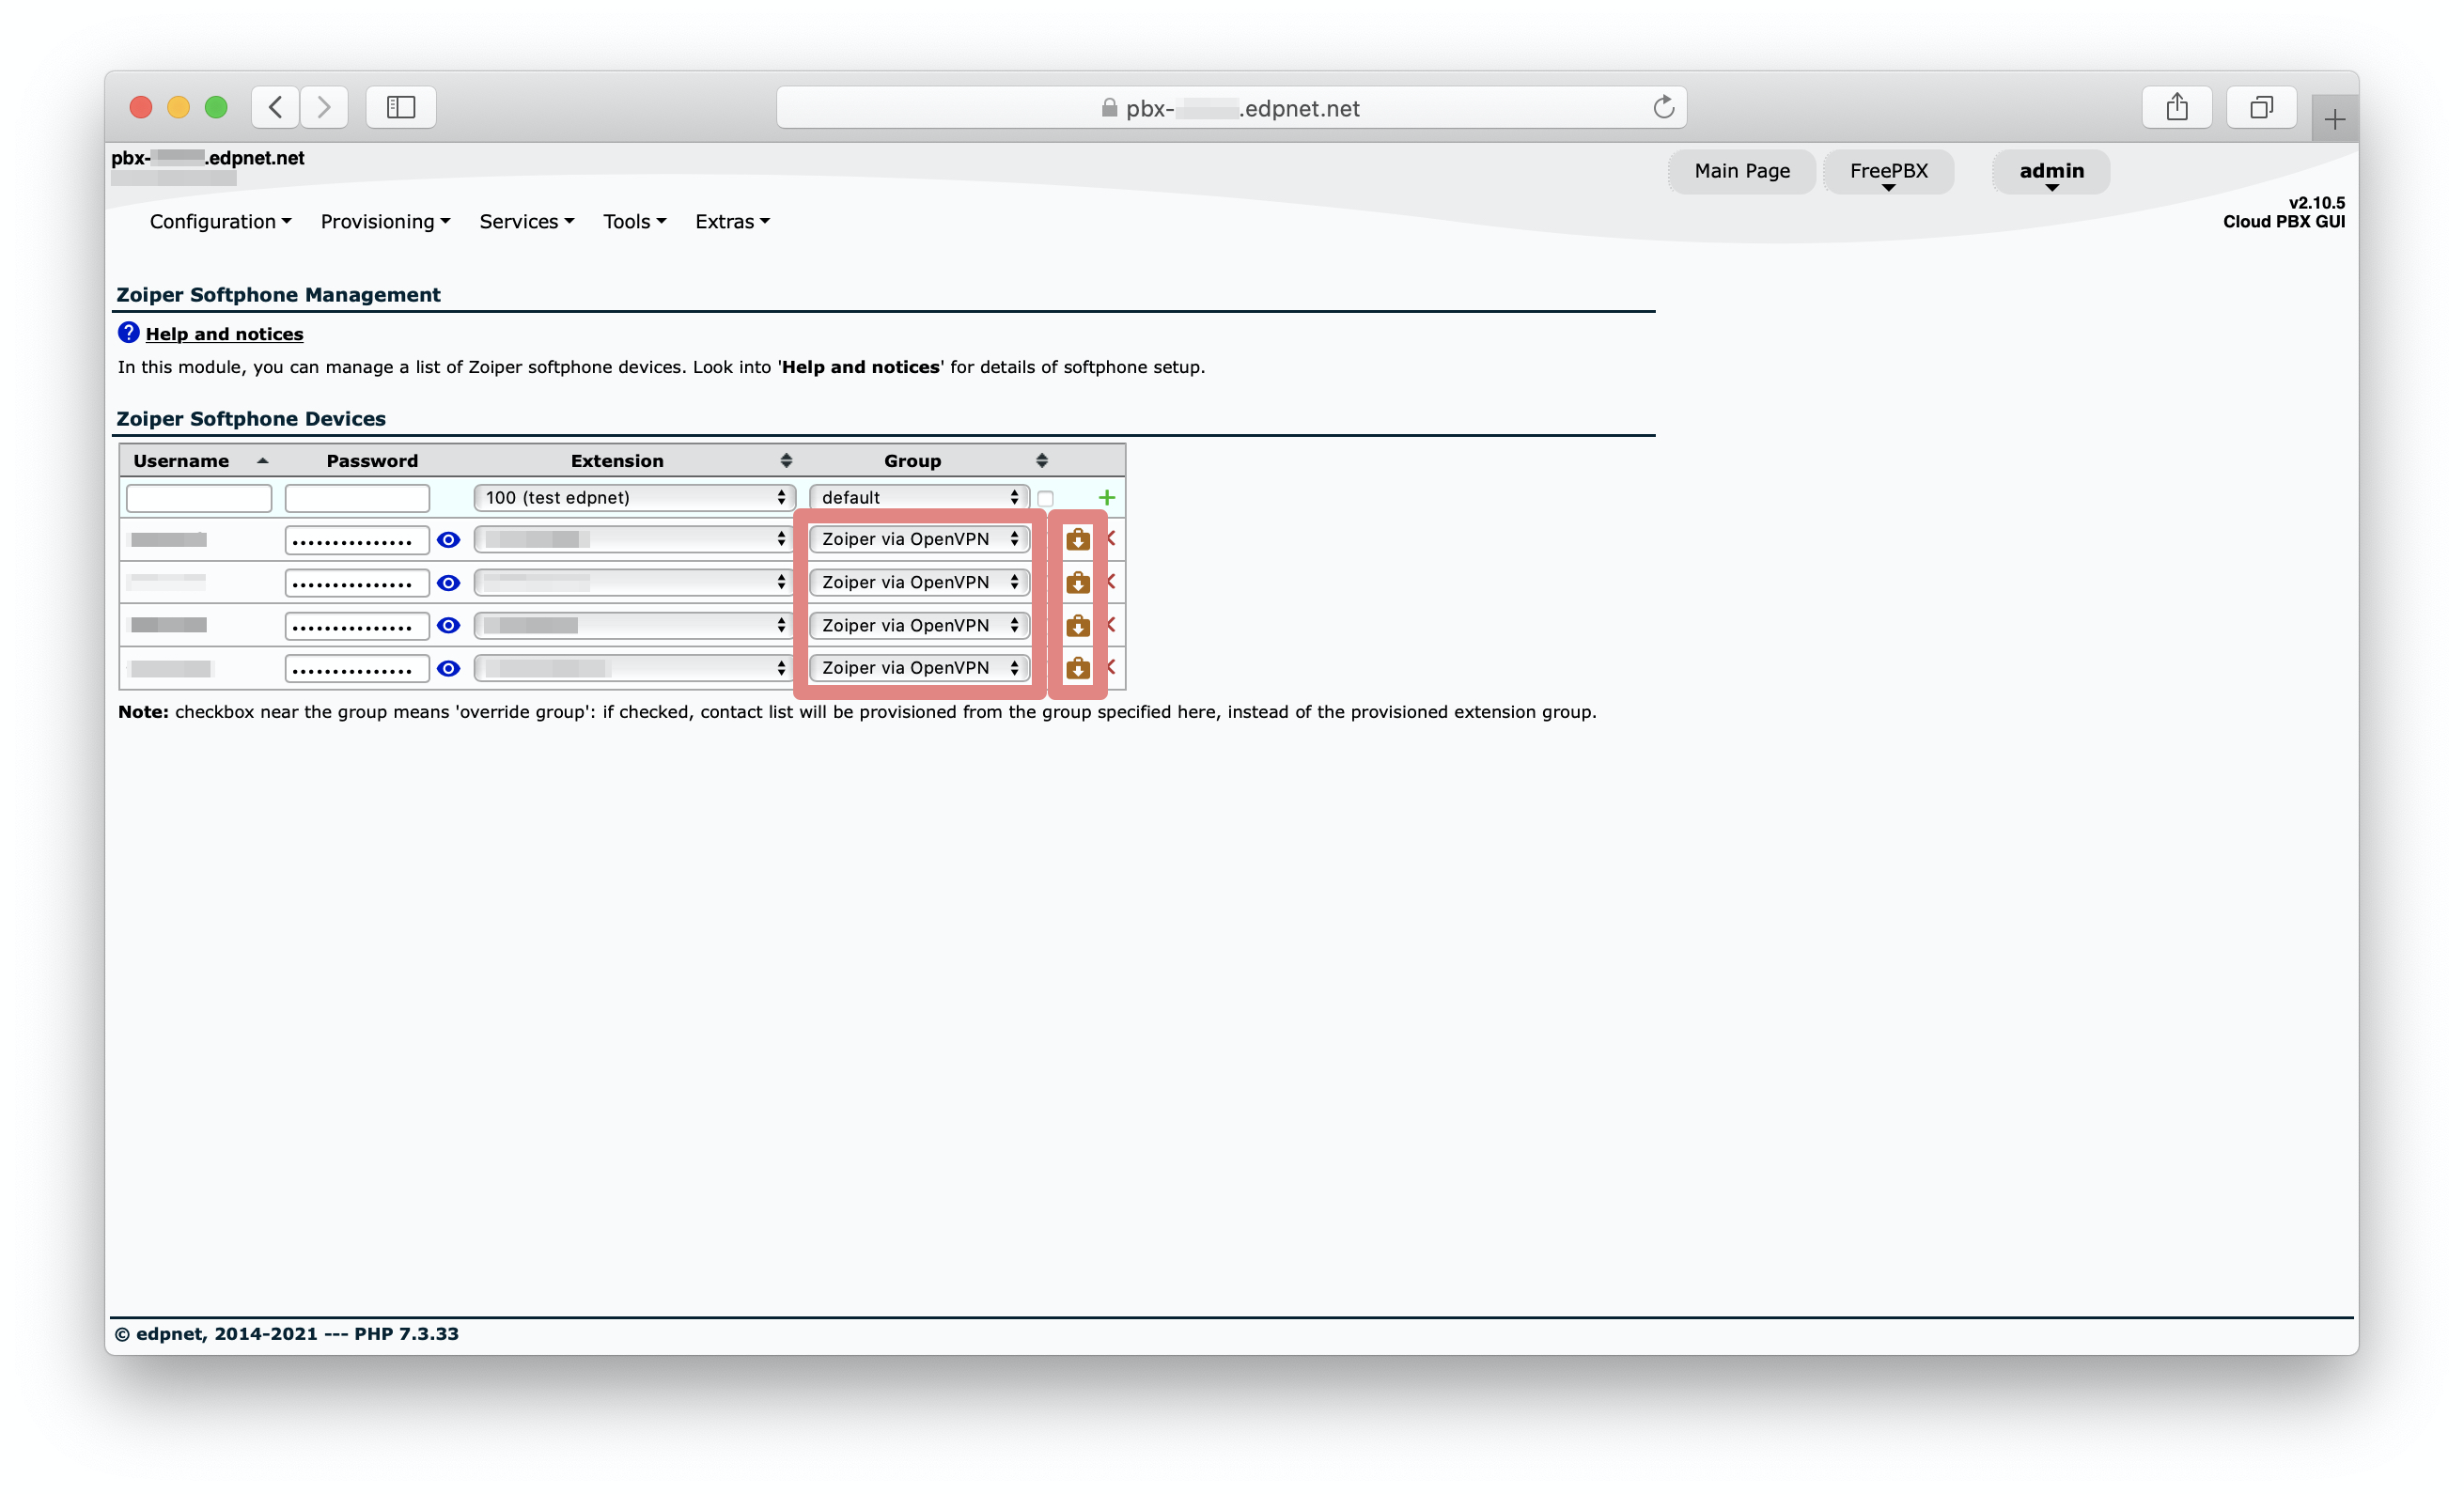
In the menu on top, click on Configuration and select Zoiper Softphones from the drop-down list. Select the Group Zoiper via OpenVPN next to the device that you're setting up and hit download icon:

6. Rename the file that you have just downloaded to Provision.xml and place it into:
- Windows: either Zoiper installation path or an Application Data\Zoiper5 user directory (AppData\Roaming\Zoiper5)
- Mac: Zoiper configuration path (~/Library/Zoiper5)
7. Run Zoiper, activate your Zoiper license with credentials that you have received from our support, and the softphone will provision itself.
